Check to see if WiFi is on– If you don’t see a blue light on the printer above the WiFi icon, hold the WiFi button for about 2 seconds, and once the blue light is lit, WiFi has been re-enabled and will re-connect to the station.
WiFi is enabled, but it’s not printing– Double-click the home button. There should be an app that displays all the current print jobs. If a few are pending, delete the jobs to clear the queue. Try printing a new label.
It’s still not printing– Follow the instructions below to re-connect the printer to the Kiosk station.
Step One
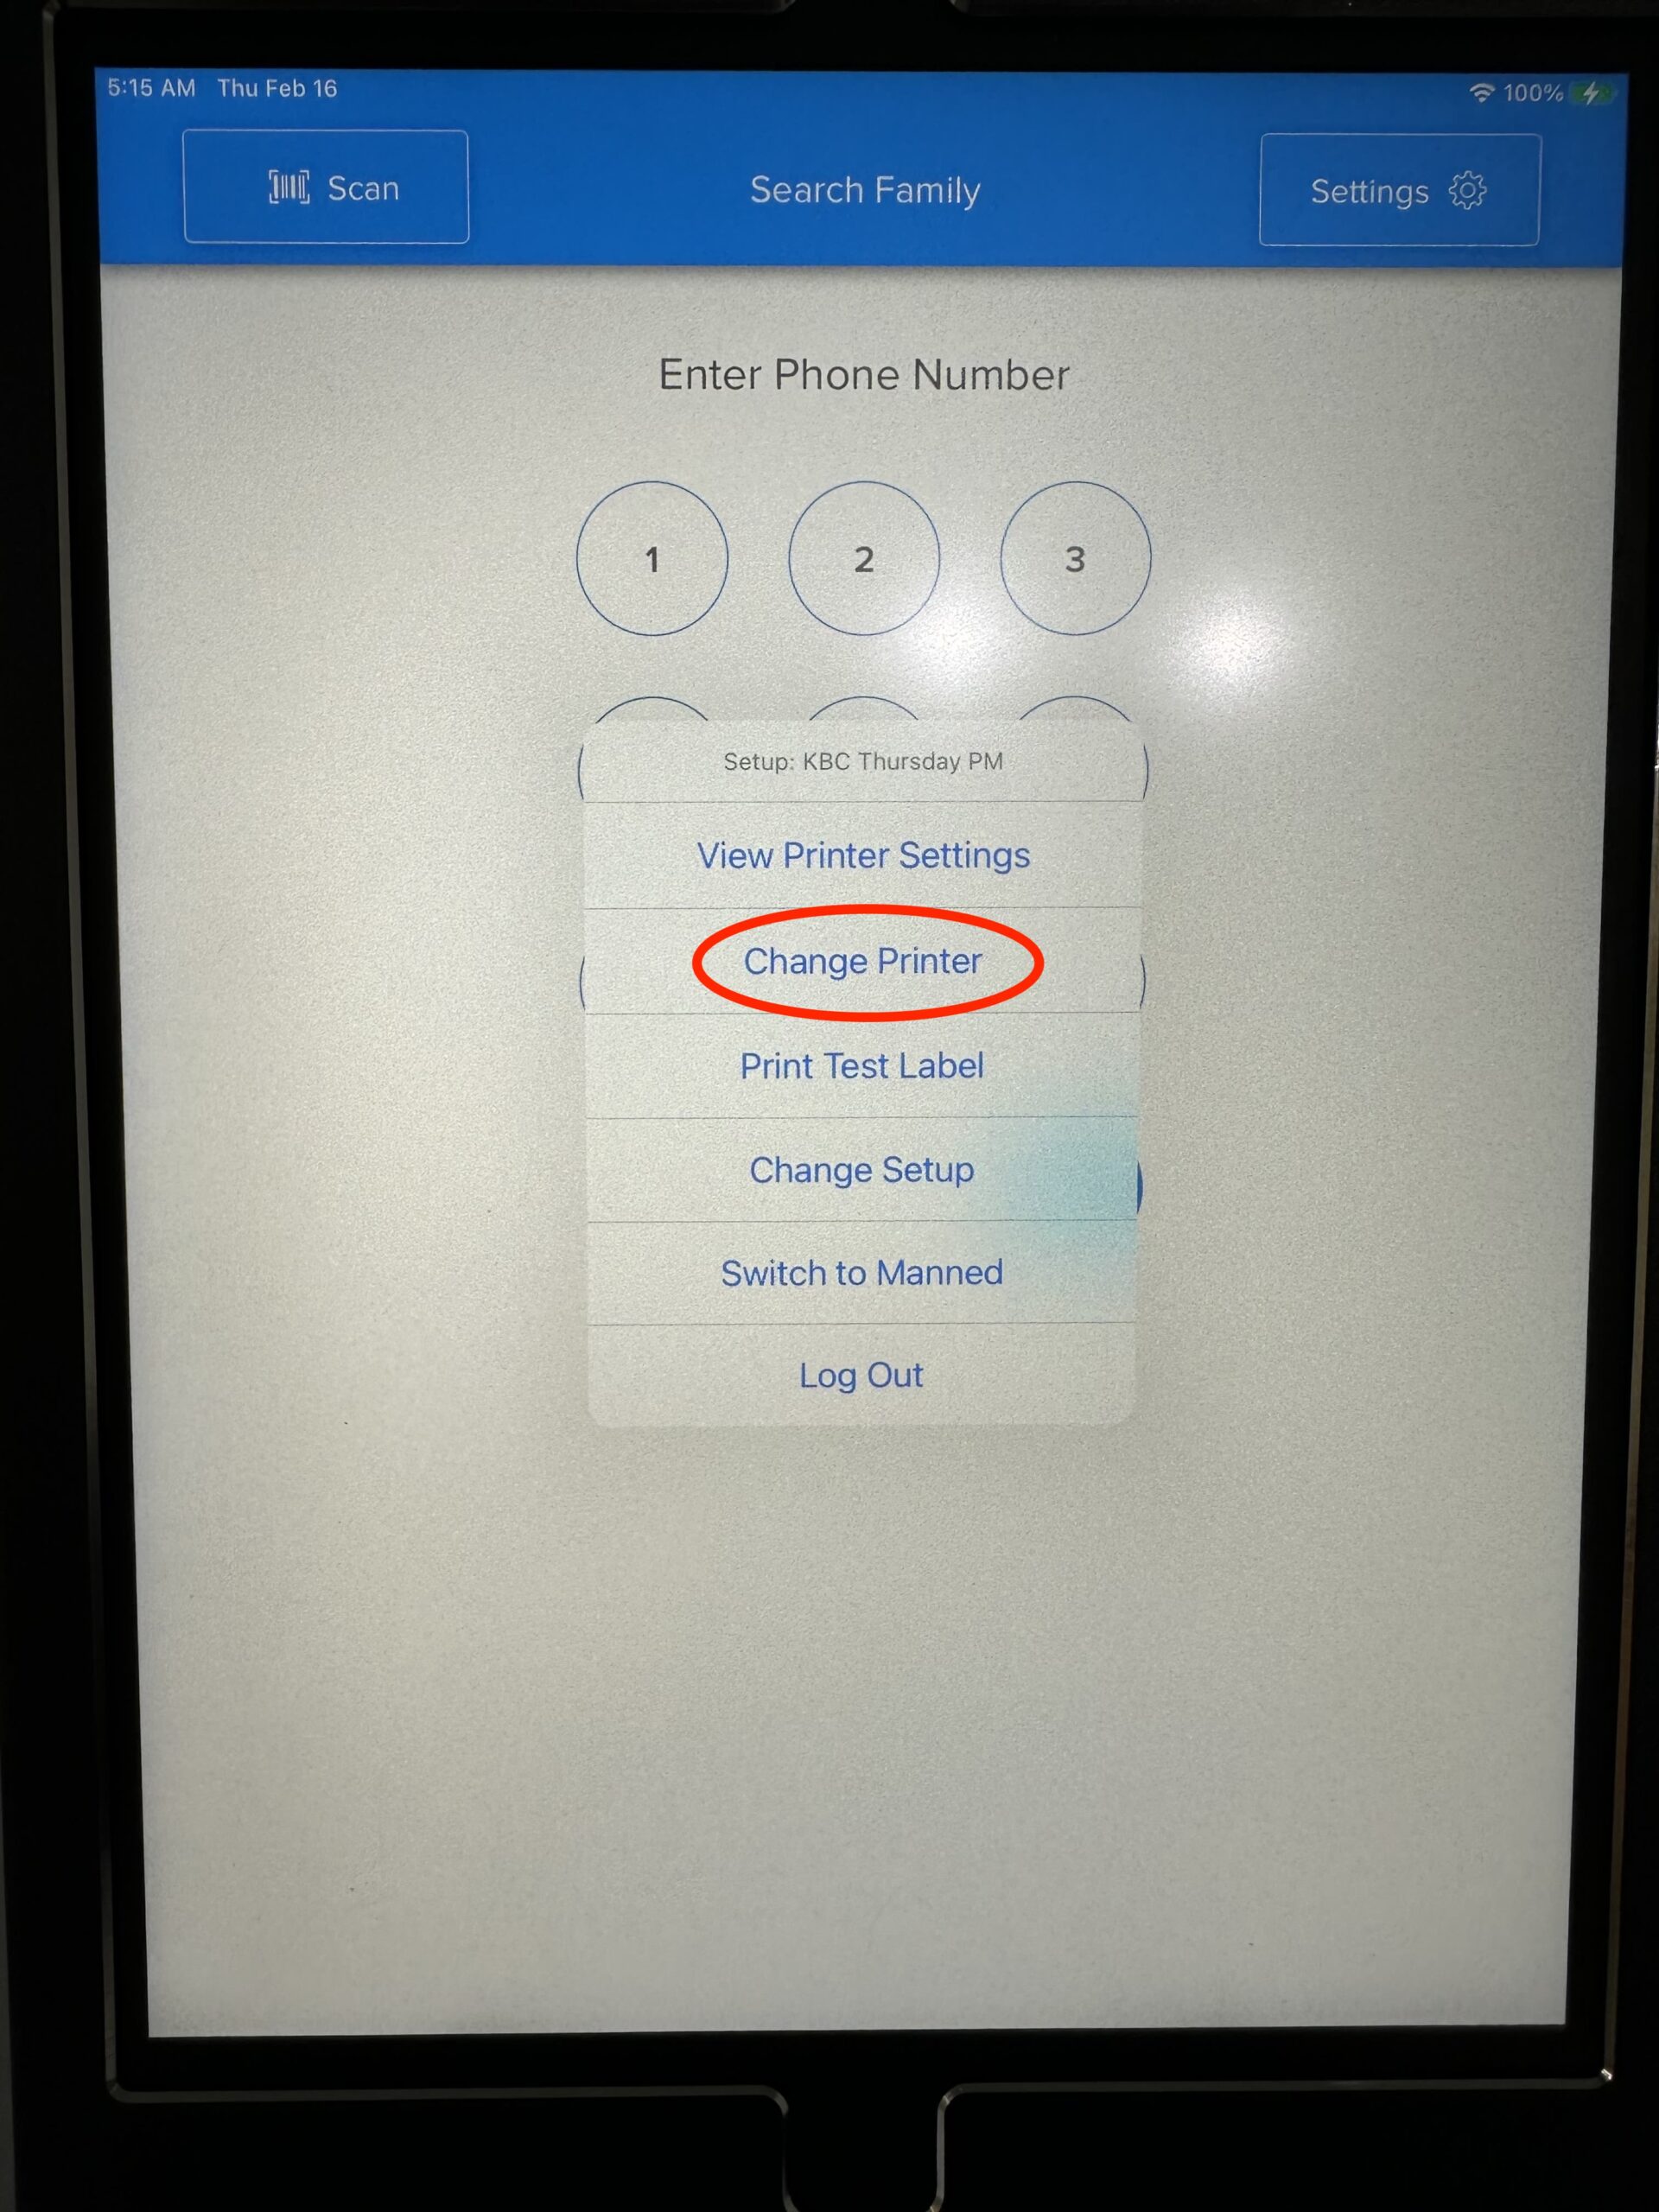
Touch “Settings” in the upper right corner of the CCB app.
Select “Change Printer”
Type in the passcode on the next screen.
Step Two
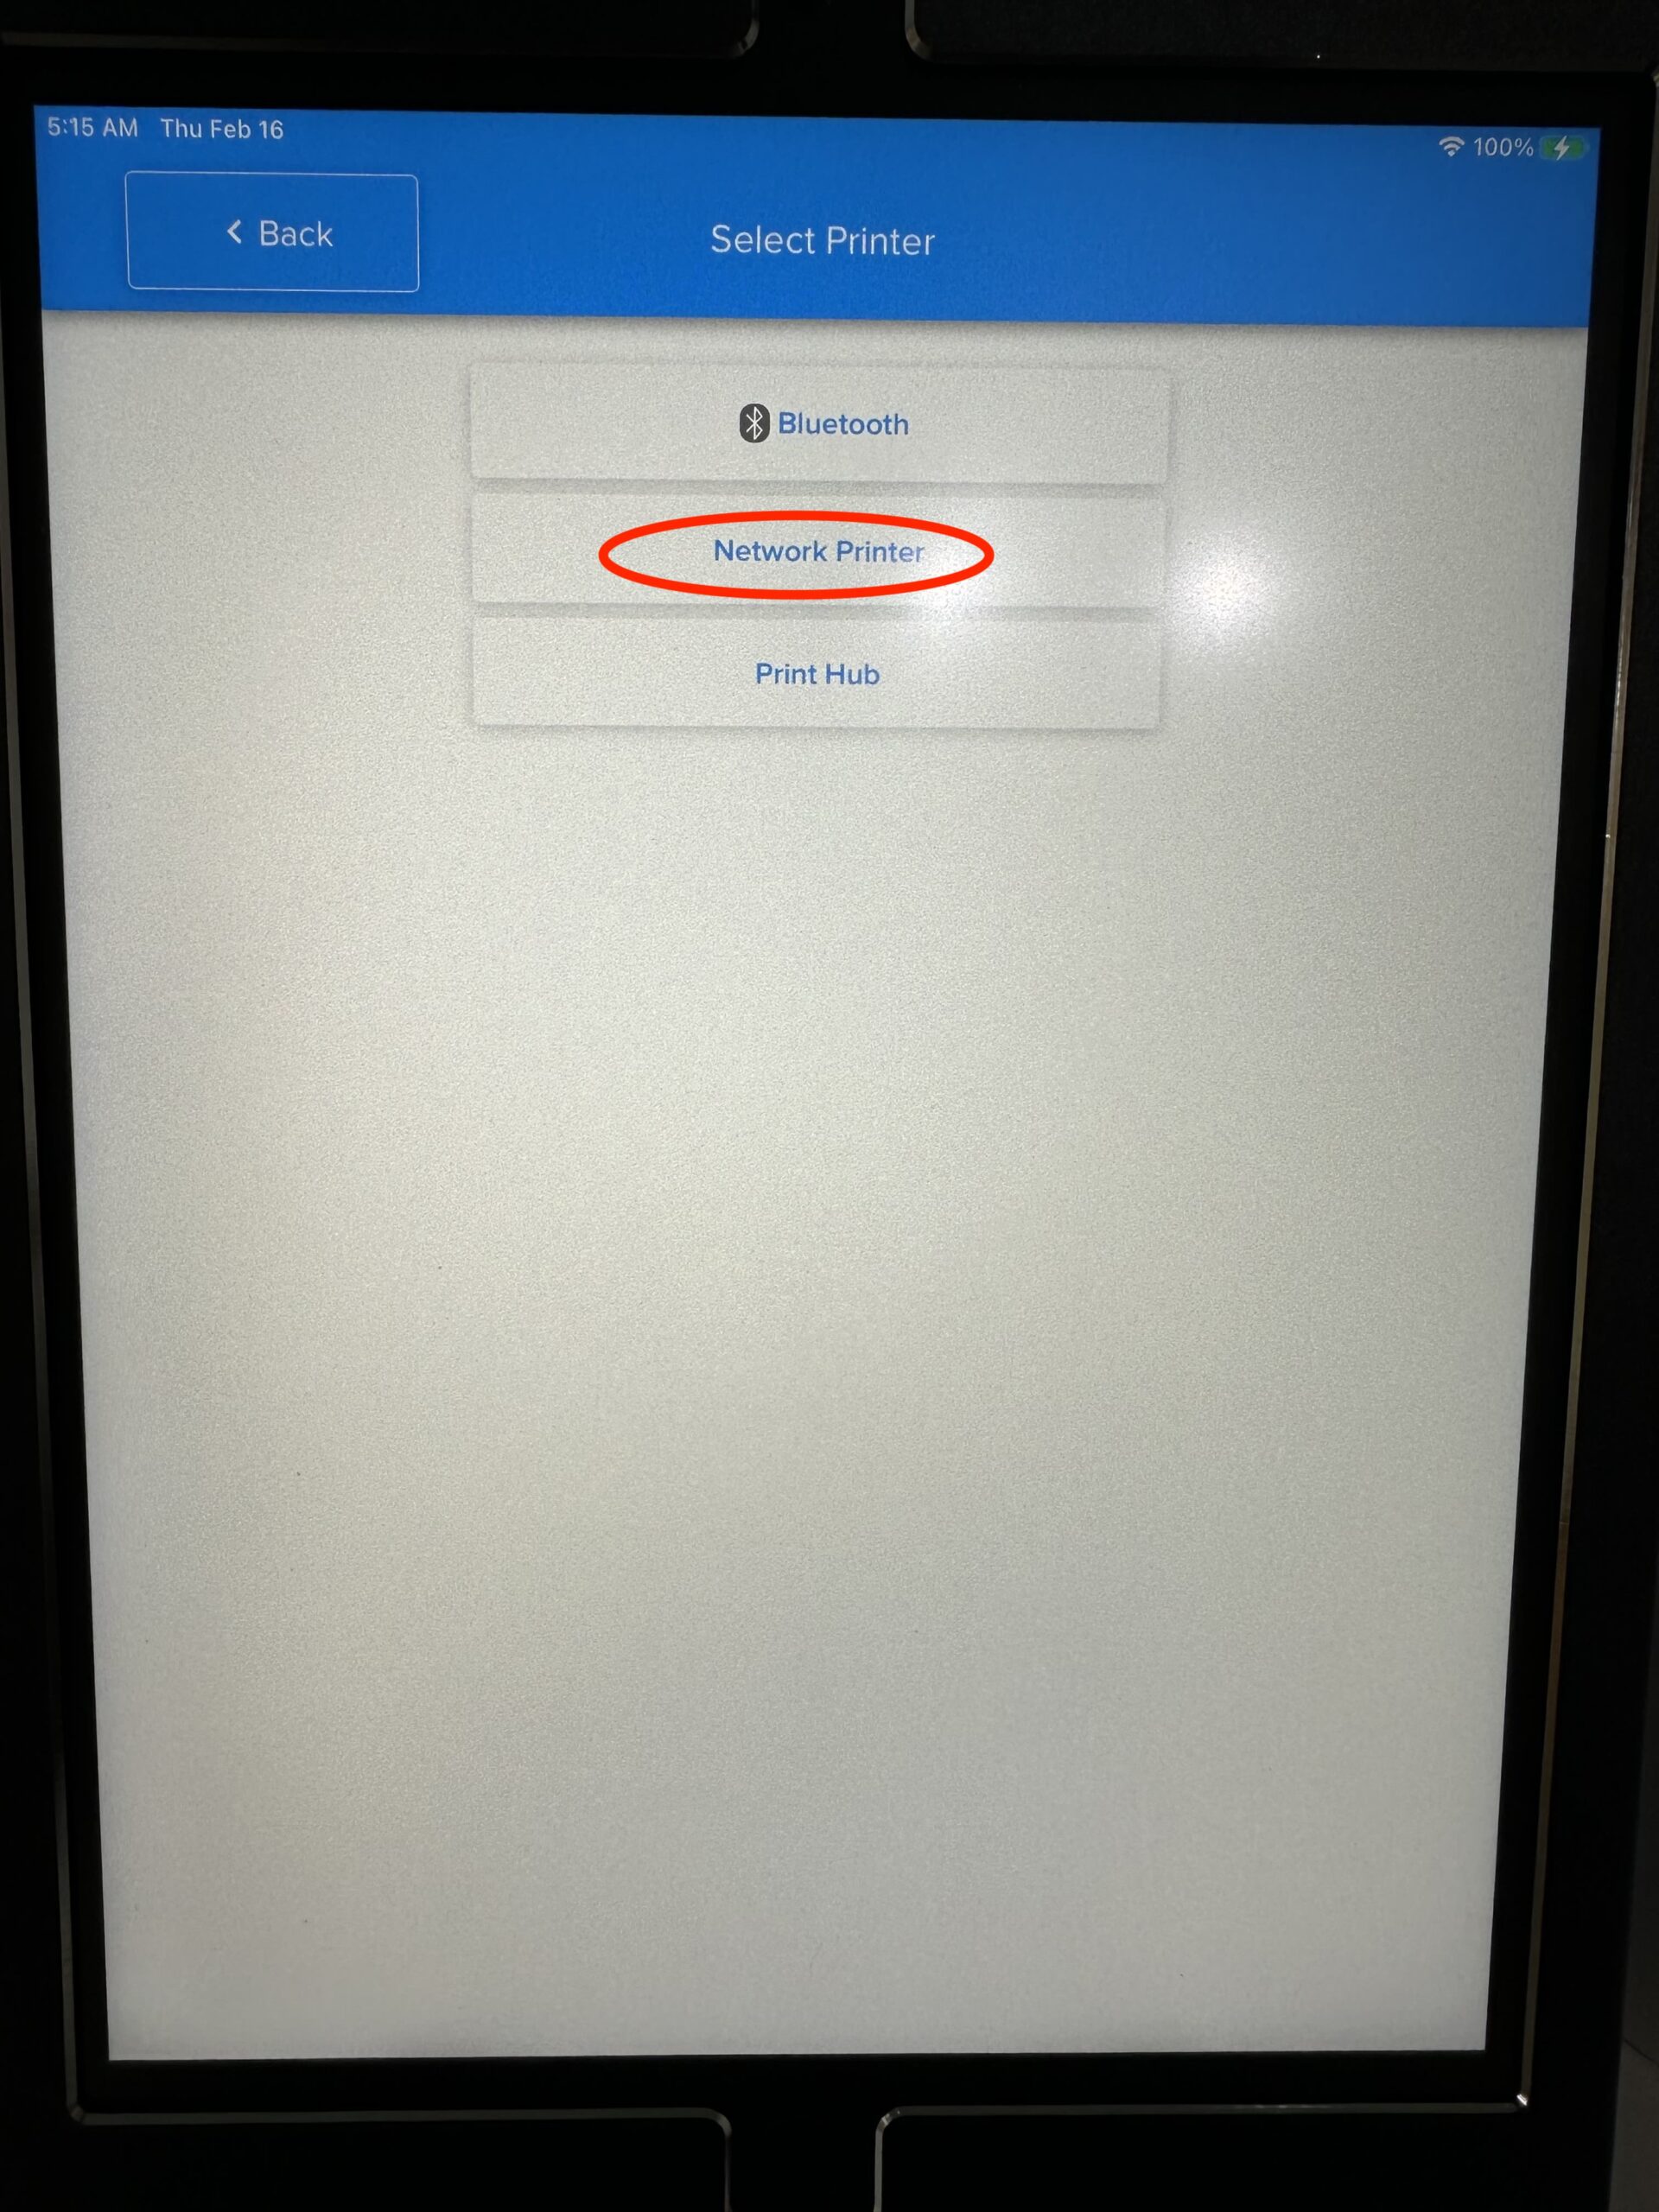
Select “Network Printer”
Step Three
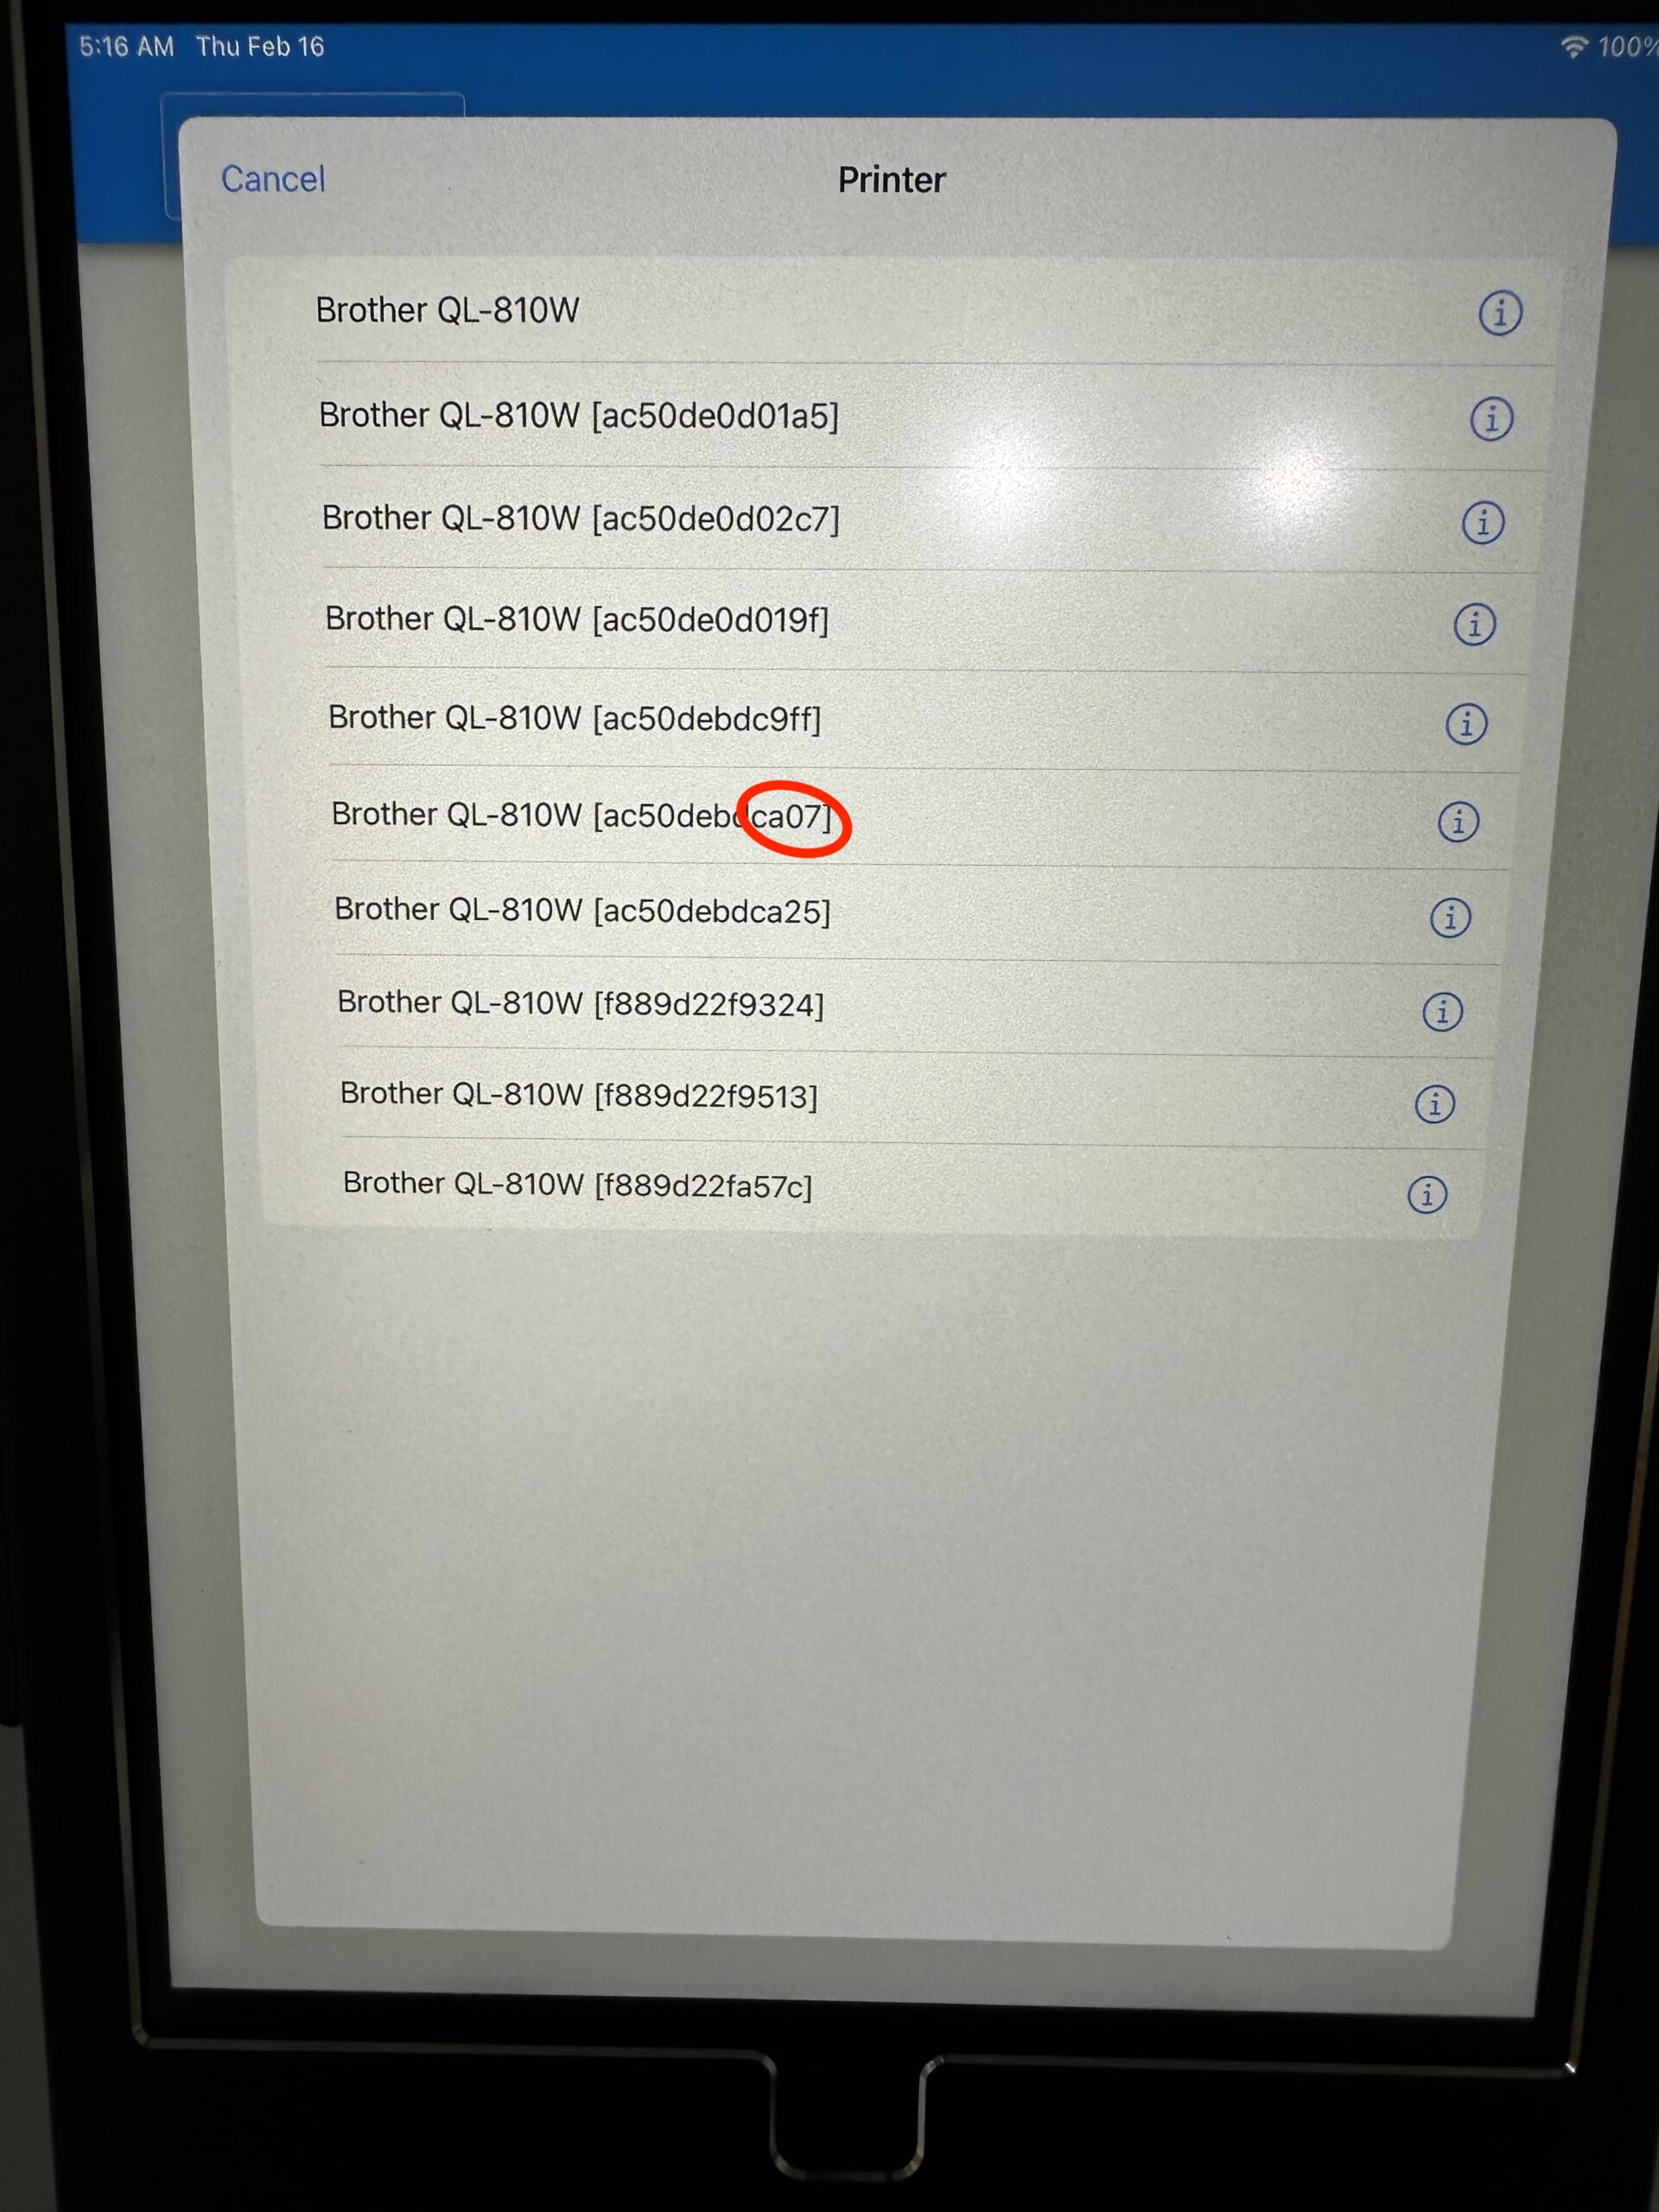
A list of printers will appear with various letters and numbers.
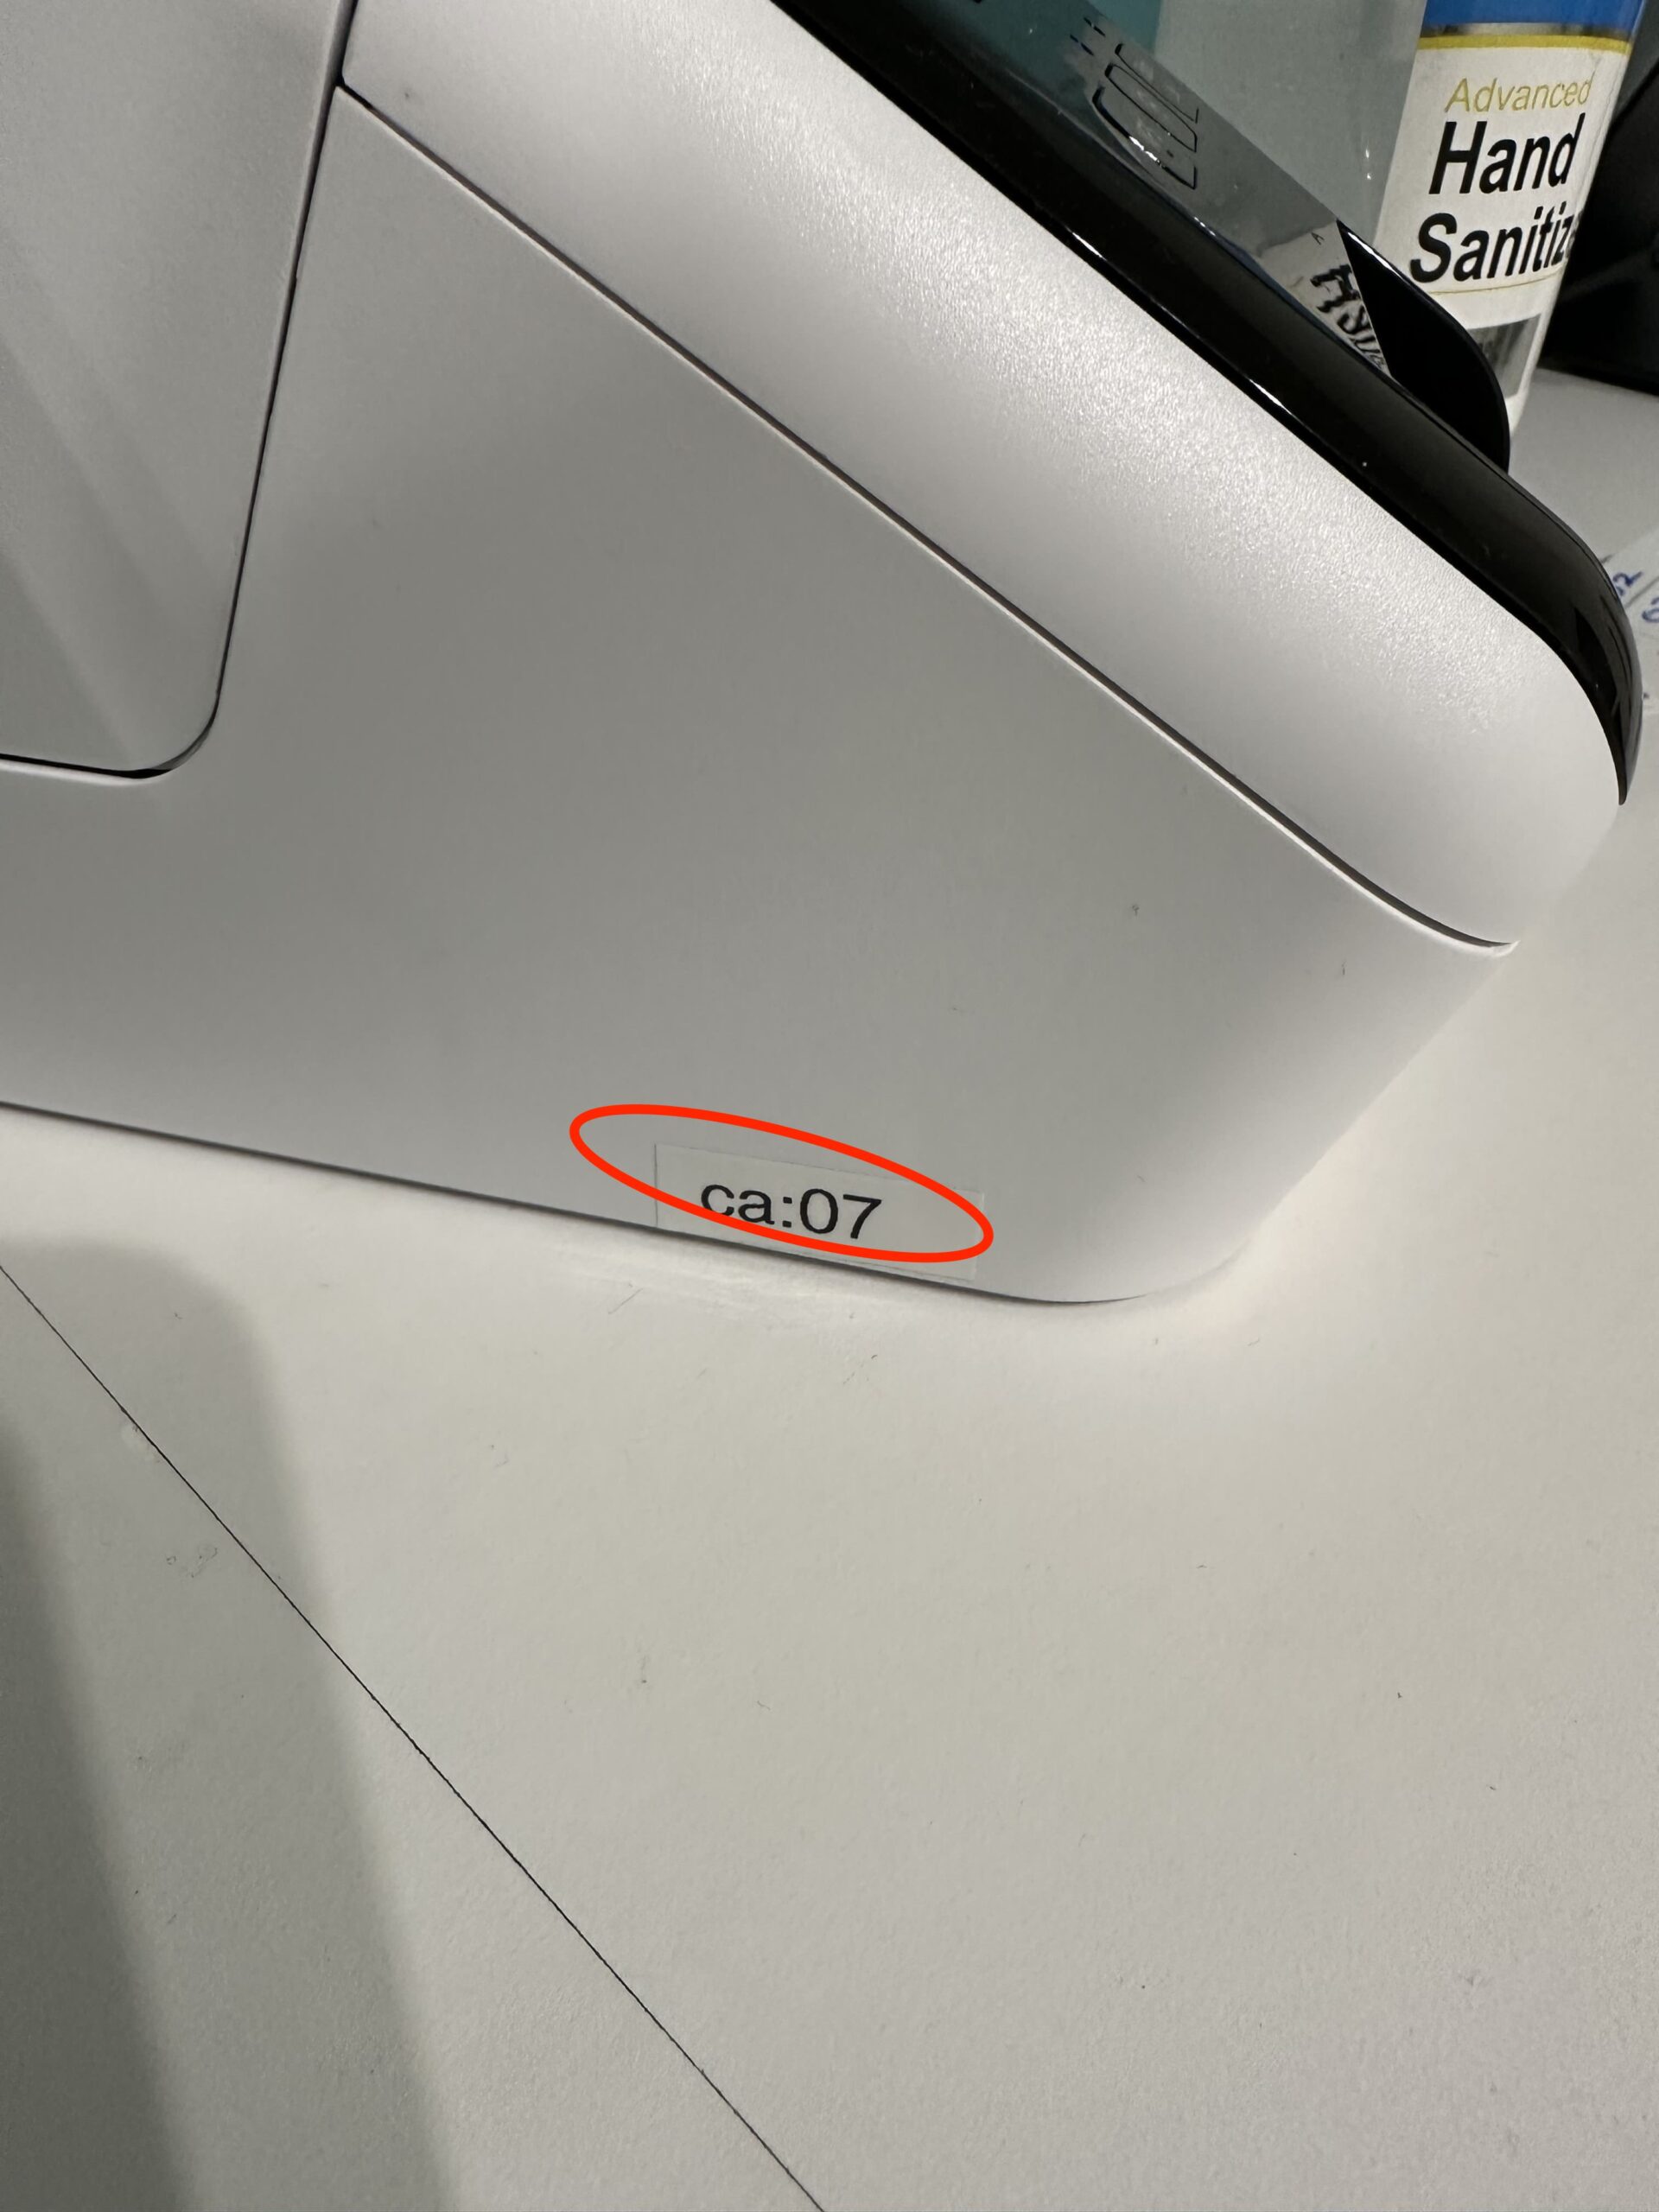
Look over at the lower right corner of the printer.
You will see two sets of numbers or letters (example: a5:7c).
Match those numbers with the ones on the CCB app and select the printer.
( Note: The app will not show the colon between the two sets of numbers/letters)
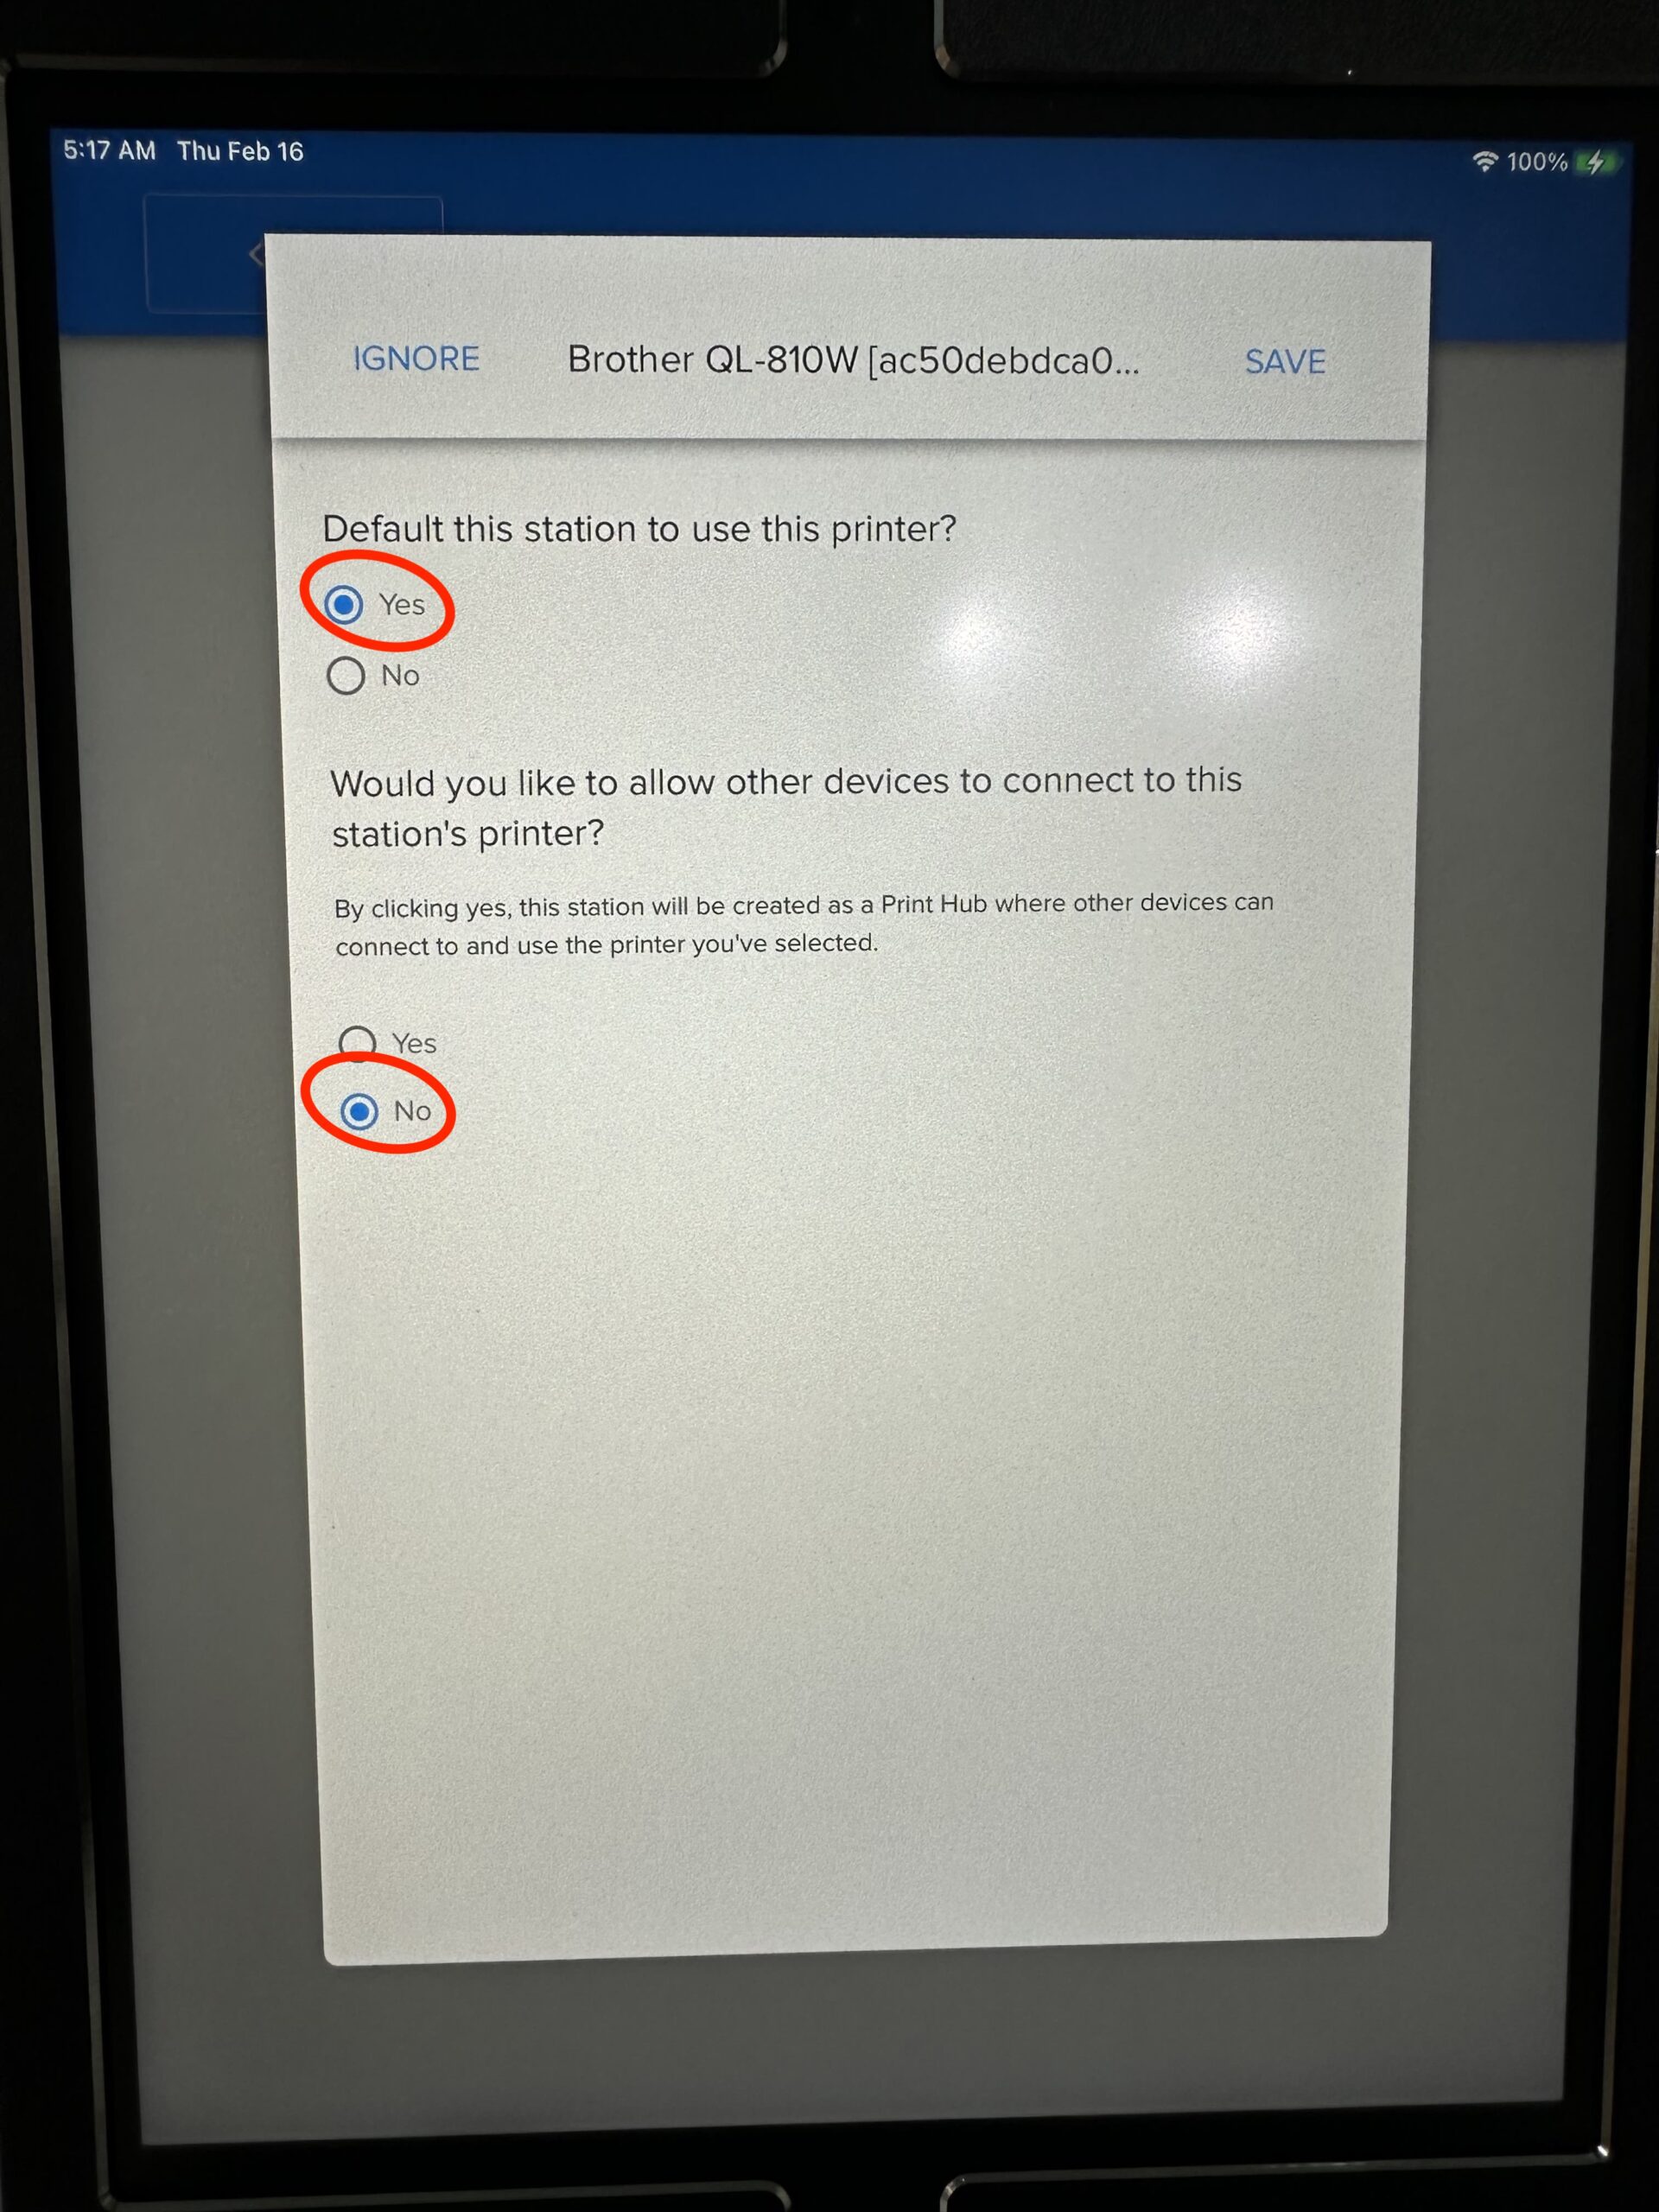
Step Four
Printer Settings:
Select “Yes” to make the printer the default one for the Kiosk station.
Select “No” to disallow other devices to connect to the Kiosk station.